Creating a Checkbox component using the Composition API
Intro
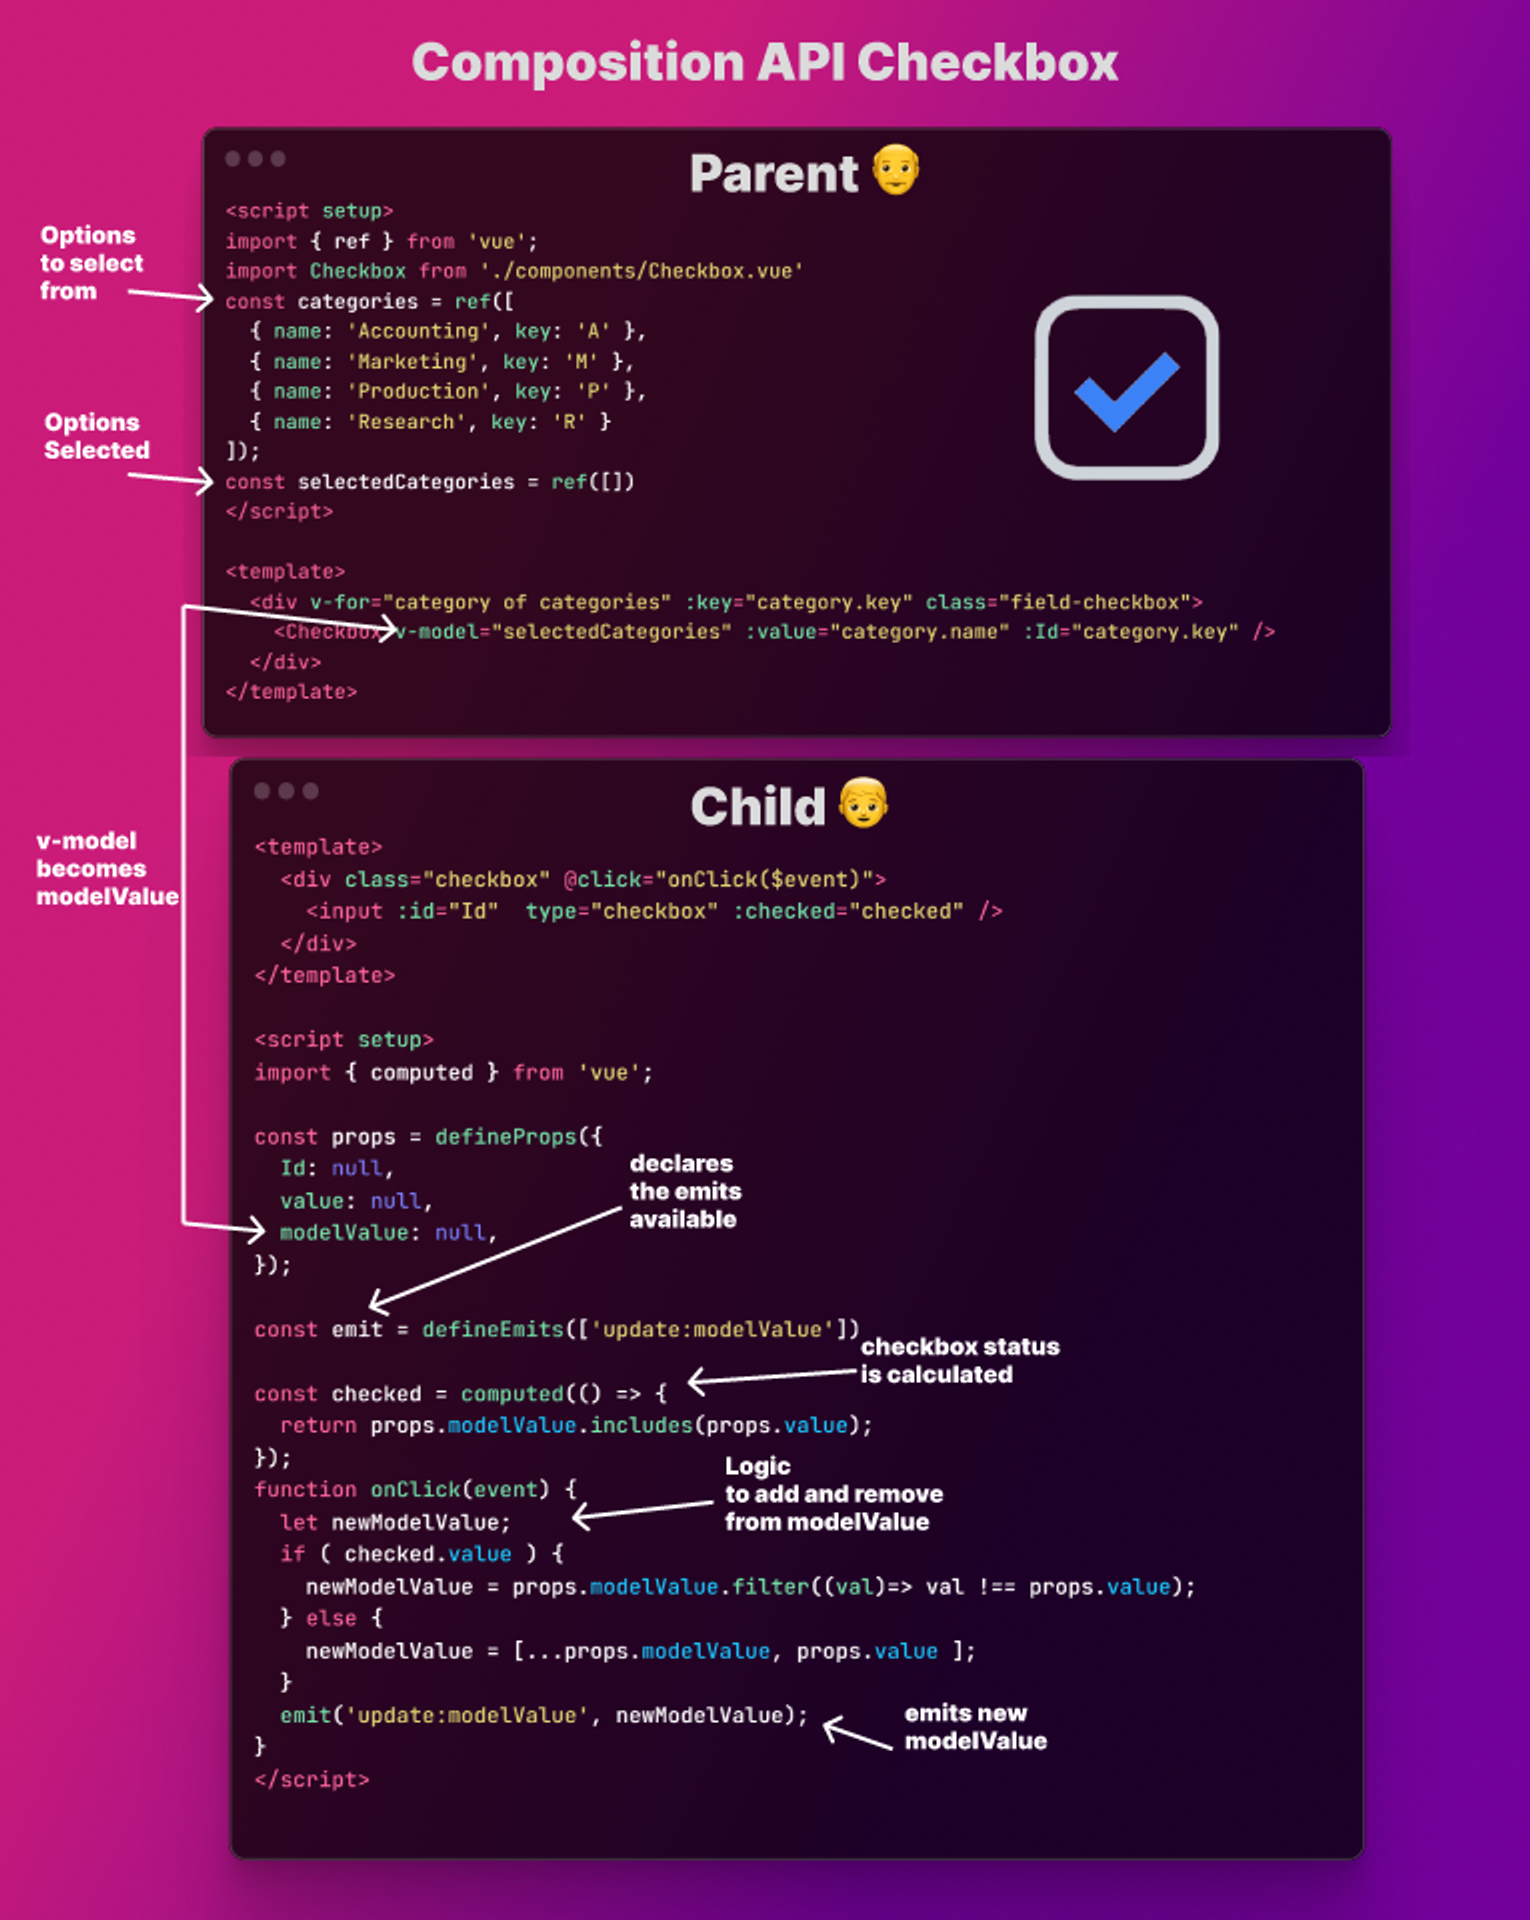
Here is a example schema of the checkbox component we are going to create:
Step-by-step guide
Step 1: Setting Up the Environment
Before we begin, make sure you have Vue 3 installed on your computer. If you haven’t installed it yet, you can do so using npm:
npm init vue@latest
cd <your-project-name>
npm install
npm run dev
Step 2: Creating a New Component
To create a new single file component, create a new **.vue**file in your project’s components directory. For example, if your project’s components directory is named components you can create a new component named **Checkbox**by creating a file named Checkboxy.vuein thecomponents directory.
<template>
  <div class="checkbox" @click="onClick($event)">
    <input :id="Id"  type="checkbox" :checked="checked" />
  </div>
</template>

<script setup>
import { computed } from 'vue';

const props = defineProps({
  Id: null,
  value: null,
  modelValue: null,
});

const emit = defineEmits(['update:modelValue'])

const checked = computed(() => {
  return props.modelValue.includes(props.value);
});
function onClick(event) {
  let newModelValue;
  if ( checked.value ) {
    newModelValue = props.modelValue.filter((val)=> val !== props.value);
  } else {
    newModelValue = [...props.modelValue, props.value ];
  }
  emit('update:modelValue', newModelValue);
}
</script>
<style>
.checkbox {
  border: 1px solid black;
  display: flex;
  height: 40px;
  width: 40px;
  justify-content: center;
  align-items: center;
}
</style>
In this example, we’ve created a simple component with a template, a script, and a style. The **template**section contains the HTML for the component, the **script**section contains the logic for the component, and the **style**section contains the CSS for the component.
Step 3: Registering the Component
To use the component in your application, you’ll need to register it with Vue. You can do this in two ways, by importing the component and registering it in your application’s **main.js**file.
import { createApp } from 'vue'
import MyComponent from './components/MyComponent.vue'

const app = createApp({})
app.component('my-component', MyComponent)
app.mount('#app')
In this example, we’ve imported the **MyComponent**component and registered it with the application using the **app.component**method. We’ve also mounted the application to an element with the ID of app. Or you can register the component in the file itself:
import Checkbox from './components/Checkbox.vue';Conclusion
That’s it! You’ve learned how to create a single file component in Vue 3. With this knowledge, you can create reusable components that can be used across your application.
Step 4: Using the Components
Once the component is registered, you can use it in your application by adding the component tag to your HTML.
const categories = ref([
  { name: 'Accounting', key: 'A' },
  { name: 'Marketing', key: 'M' },
  { name: 'Production', key: 'P' },
  { name: 'Research', key: 'R' }
]);
const selectedCategories = ref([])
</script>

<template>
  <div v-for="category of categories" :key="category.key" class="field-checkbox">
    <Checkbox v-model="selectedCategories" :value="category.name" :Id="category.key" />
    <label :for="category.key">  {{ category.name }}</label>
  </div>

  <div>
  {{ selectedCategories }}
  </div>
</template>